Guide
Accounts & permissions
Who can sign in and what they can do.
On this page
Login and schools
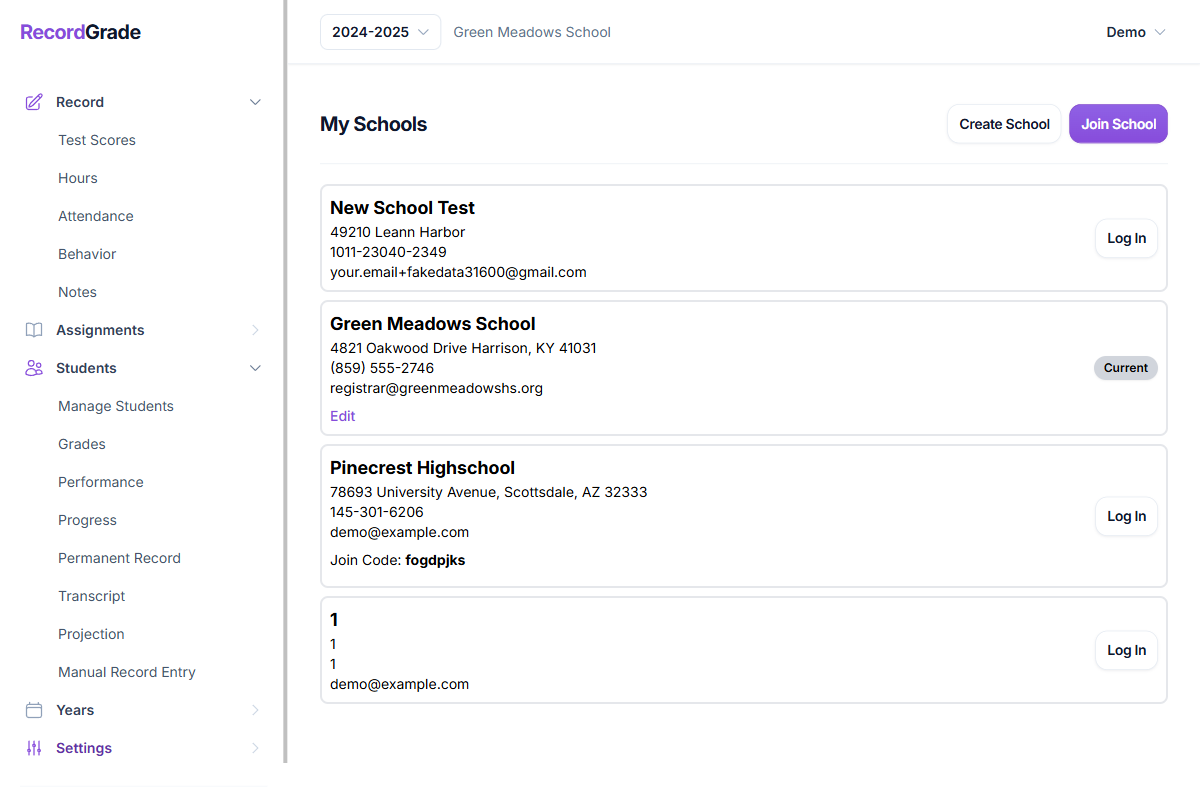
Each person uses their own email/password. One login can belong to several schools; switch under Settings → My Schools.
Add staff
Join code
- Admin: My Schools → Edit school → enable Allow others to join → share the join code.
- Staff: register, open My Schools → Join school, enter the code.
- Admin: Settings → Users → Manage → Approve access (needs a free seat).
Add by email
On Users, Add by email for someone who already has a RecordGrade account. Free seat → active; at seat limit → pending. The app only tells you whether the add worked, not whether the email exists (privacy).
Solo plan (one seat)
You cannot approve a second active login. Options:
- Transfer school on a pending user (Manage) — they become admin with full permissions; you leave the school.
- Or upgrade seats under Billing.
Decline pending requests anytime; that does not use a seat.
Permissions
Set per school under Users → Manage, on the Permissions tab. Typical sets (Admin, Homeroom, Teacher, Office) fill the boxes; you can change any box after.
| Permission | Allows |
|---|---|
| Modify Student Records | Scores, hours, attendance, behavior, notes, projections, manual entry |
| Manage Students | Student roster |
| Years & Enrollments | Years, terms, year enrollments |
| Manage Assignments | Courses, categories, patterns, no-grade courses |
| Enroll Students in Assignments | Course / no-grade enrollments |
| Lesson Planner | Lesson plans and year calendar |
| Settings | Users, billing, report settings, scale, graduation, behavior setup |
Typical classroom teacher: Modify Student Records. Admin: include Settings.
Who you see
On Users → Manage, use the tabs. Leave a tab empty if it does not apply. Empty grades and courses means the whole school.
- Grades — roster, attendance, and report cards for those students. Test scores and the calendar are courses at those grade levels (an 8th grader in 7th-grade math shows on the 7th-grade book) unless you also pick courses. Optional: show every course these students take.
- Courses they teach — if you pick any, test scores and the calendar are only those classes (everyone enrolled).
You cannot change your own permissions. You can open Settings → Users → Manage on yourself and set grades and/or courses so Test Scores is not the whole school. Clear both tabs for the whole school. Settings stays on.
Billing is school-level: Settings → Billing (Settings permission).
Common questions
Teacher can’t see a student who is enrolled
Check the teacher’s grade-level or course limits, that the student is year-enrolled (and course-enrolled, for course-only staff) in that range, and that the correct school year is selected.
What if I remove someone’s Settings permission?
They lose access to school configuration and user management for that school. Day-to-day record permissions remain if still granted. Ensure at least one admin keeps Settings.
Can two people share one login?
Not recommended. Permissions, auditability, and Solo seat rules assume one person per account. Use join/approve for each staff member.
Pending user at seat limit
They cannot work in the school until a seat frees or you upgrade. Decline if the request was a mistake.
Password reset / email change
Use the login screen’s forgot-password flow. Contact customer support for details if you need an email address changed on an existing account.